The Finished Product
At long last, the project is done.
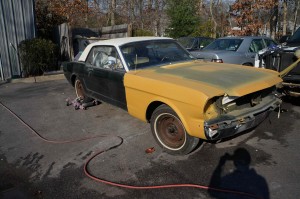
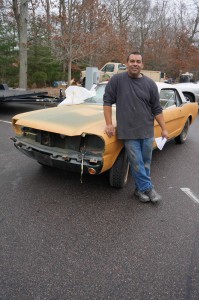
Below is the Before/After video for the project. I dedicate this, with heartfelt thanks, to all who contributed, helped out, or were otherwise involved.
Special thanks to Julian Alvarez and Will Greenberg for helping to film it.
Exhibition Ready
The interior work is finally done!
It took a little longer than expected – partially due to underestimating the time it takes to do something like this, partially due to miscellaneous product backorders and delays – but, at long last, I can say that the work is at a point I feel proud enough to present.
In my last post, a major blizzard was closing in and due to arrive the same day as my upholstery. Alas, despite my somewhat uncomfortable level of forced optimism, the upholstery did not arrive the day I had intended it to. The blizzard pushed the delivery date back three days to Monday, and I missed the opportunity of that weekend to get the final work on the seats done. Luckily for me, I guess, there was still plenty of work to do before the seats went in… so I stayed very busy, despite the storm.
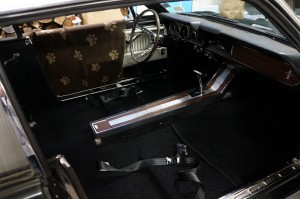
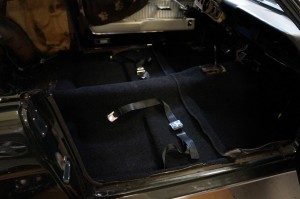
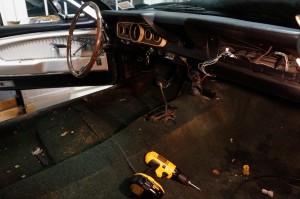
Everything, sans seats, was finished that weekend: the rear quarter trim panels, kick panels, door sill plates, instrument panel, speedometer cable and center console all went in – all brand new, apart from the rear quarter trim panels and frame for the center console. Everything looked amazing, and the sight of the near-finished product gave me motivation to finish it.
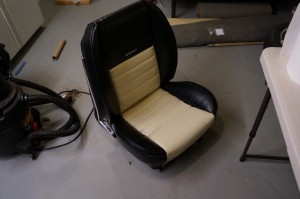
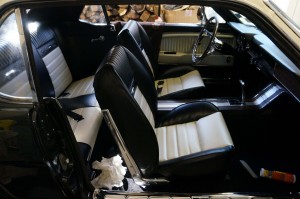
Monday rolled along, delivering with it a full set of black and white Mustang upholstery, but it was also the first day back at school, post-holiday. I couldn’t spend the whole day working on the car anymore, so I relocated one of the seats and all the necessary equipment from my grandmother’s garage to my Dad’s studio. This way, I could work on reupholstering one seat a night after school during the week.
It became clear very early on that this was a two person job, and, as he had been throughout the whole project, my Dad was right there to help. The amount of stretching, squeezing, pressing, holding, pulling, clipping and general work that needed to be done to finish one seat was really tough on our hands, not to mention our bodies (and admittedly our emotions). This was definitely the hardest part of the project. It took us four evenings to complete, but we finally finished the driver’s seat. Ugh! One down, and now we needed to do it all again… and then again, for the rear bench.
By the following weekend, the rest of the seats were done… and luckily things got easier with experience. On Monday, I took the day off from school to mount all the seats, buff out as much of the scratch on the windshield as possible, and clean up the significant mess we had made in my grandmother’s garage and basement. My Mom even lent a hand to put the finishing touches on the car – repainting the emblems and the gas cap with the Mustang logo colors to look almost new.
When all was done that evening, I took my parents out for a little victory lap… to fill up the gas tank and enjoy the finished interior.
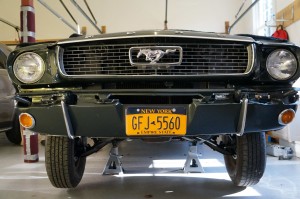
Tomorrow is Senior Project Exhibition Day at school, and I’ll be officially unveiling the refurbished Pony. The new bumpers have yet to arrive (they’re due to arrive Friday, the day after the exhibition), so we had to put the old bumpers on instead. Even though they aren’t new, they do complete the look, and the new ones will go on as soon as possible.
All that’s left to do is the final before-and-after video, which I will complete in the next week or so. But, for now, my work on the car is complete, and I am oh, so very proud of it… and so very grateful to all who helped to make it possible.
Mustang Interior Work
Progress!
This past week has been the most productive of the whole project to date. It feels like something just clicked, and the work is now progressing at an accelerated pace. Maybe it’s the four or five hours of work we’ve been able to put in every day (thanks to being on Christmas break), or maybe it’s the encouragement of seeing the light at the end of the tunnel. Maybe it’s just the daily double macchiato. Whatever, things are getting done and major progress is being made. We’re in the home stretch!
Here are many updates:
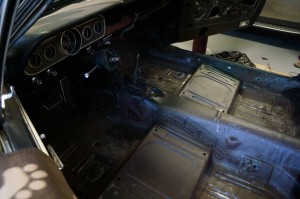
The carpet is in. There was some major rust in the floor pans, so many hours were spent with a rust grinder and shop-vac. Everything eventually came out pretty clean. All was sprayed with Rust-Oleum, as an extra line of defense, but there was still the damage in the right-rear pan to contend with. There was already a patch on the underside of the hole, installed by Ricardo, so my dad had the idea of putting a metal sheet above as well, so that not as much stress would be placed on it when somebody stepped into the rear.
Our first plan was to glue a sheet of steel down with liquid nails, but of course that didn’t work out. In hindsight, it wasn’t the smartest plan – gluing a steel plate to a not-very-flat surface – but it seemed a possibility in the moment. When that didn’t work, we replaced the steel with a sheet of aluminum, and the glue with screws (the way it should have been done in the first place). Unfortunately, and I’m still kicking myself for this, I didn’t get a photo of the final product… but try to imagine a shiny sheet of aluminum with 10-12 screws holding it down around the edges, and in any spot it was popping up. I guess I was too anxious to get on with putting the carpet down – I just forgot to photograph it.
We cut the carpet – black instead of green, or rather yellow-green, as the original had become, and molded mass-back, meaning it has a nicely structured rubber backing – by laying it out across the template of the previous one to get a general fit. It still needs to be cut along the sides, in order to fit smoothly and not bulge out at some points, but it’s already a welcome change from what was there before.
Next to go in were the new, fancy seat belts – and the hardest part of that was figuring out in what order the washers and nuts go on the big screw to effectively secure the belts. They are really nice looking belts, and will make the interior that much more special – and safe.
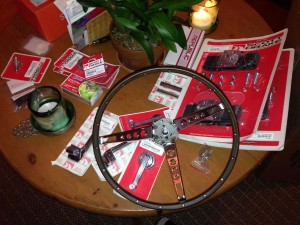
The horn assembly has been taken off the old wheel and put on the new one. Everything cleaned up really well, and looks almost new. I still have to clean the inside of the assembly – the contacts, wires, etc. – and will install the new wheel as one of the last items, after the seats go in.
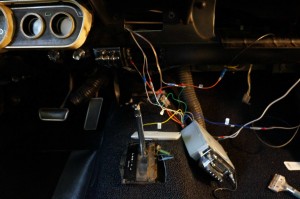
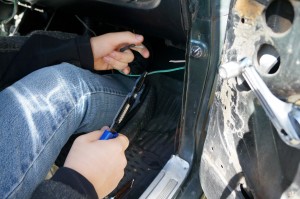
A major milestone was the completion of the radio wiring today. Before the carpet was in, I had laid down speaker wire from the new rear 6×9 speakers. I mounted the speakers in the new rear deck (this took a little longer than I had expected, as I ran into some difficulties with fitting the screws correctly), then ran wire to the left door speaker, and mounted both of those in place. Back in the summer, I thought we had found a constant source of power for the radio – but it turned out to be dome light wiring. As a result, it turned off whenever both doors were shut. The solution to this problem turned out to be running a wire directly off a lead from the positive terminal of the battery, through a small hole drilled in the fire wall, and into the radio. Everything turned out great, and now the radio is plugged in, mounted, and sounds amazing. We pretty much ran down the battery today listening to it while we worked.
Other things accomplished this week were the new glovebox liner and door and the trunk carpeting. These went relatively smoothly, though the glove box liner needs a few more screws to secure it in place.
The last major pieces to go in, apart from the center console and wheel, are the seats. I ran into some trouble with CJ Pony Parts, the retailer I’ve been ordering all my parts from, due to a delay in the new upholstery. I had ordered the upholstery, seat foam, and a new driver’s side frame in early December – but while the frame and foam arrived in a timely fashion, the upholstery did not. When I reached out to customer service this week, I learned that the product was on backorder with the manufacturer and would not arrive until sometime around January 13th. Senior projects are due to be completed by January 8th. That was a pretty stressful period… until today, when I got an email saying that it had in fact shipped, and was due to arrive Friday (tomorrow). Of course, we are in the middle of a blizzard here, so who knows if it will get here tomorrow or the next day, but it certainly is better than the 13th. Big relief.
I have posted a new photo album of the interior work Here and will be updating it until everything is done.
A Green Christmas
The paint job is finally done, and boy, is it pretty!
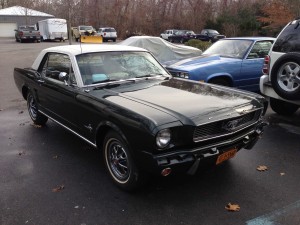
Ricardo did an amazing job. It’s incredible how much a fresh coat of paint has done for the look of the car. No longer are there scratches, chips and dents in the paint and body. Gone is the giant gash in the rear end. In its place is the deepest metallic Ivy Green and three layers of clear coat that make the car so shiny you can see your reflection in it. Yes, we are still waiting on the bumpers to arrive, but when they get here, sometime next week, the exterior will be done.
Meanwhile, all operations have been relocated to the left bay of my Grandmother’s garage and the small workshop in her basement. Day One of the marathon to finish the interior has concluded and the car is almost completely gutted. Out went the seats, door sills, seat belts and center console. Things went smoothly today, apart from some difficulties with removing the passenger seat. Ricardo had made a patch over some rust on the floorpan, and it had covered up one of the four access holes for where the seat bolts to the car. My dad – first assistant on this job – helped me drill a hole through the sheet metal patch, and eventually were able to get the seat out.
What’s in store for tomorrow is removing the steering wheel, laying the wiring for the rear speakers, tearing the old carpet out and trimming the new one to fit. Hopefully the day will end with the new carpet in place… The rest will follow.
New Paint Job Photos
I visited Ricardo today to check in on the progress of the paint job, and it’s nearing its completion. I added a few more photos to the album. You can find them at the end of the existing album Here. The green is about to be put on and the car should be done by the weekend.
The Pony Paint Job
At long last, the Pony is finally getting its paint job!
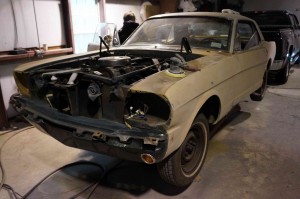
The decades of scratches, dings, dents and wear are being smoothed out and made to look like new again. After much deliberation and consultation, I chose to go with the same original Ivy Green color. The man painting it, Ricardo Mendez, in Springs, NY, found several other things that should be, and probably will be, replaced or repaired while he has his hands on it – including the rusty bumpers.
As of now, the body has been sanded, panels have been smoothed out, several coats of primer (first yellow, then grey) have been sprayed, and this weekend, if all goes well, he’ll be able to start applying the deep green. I’ve made a photo album of the paint job in progress that I will update as we go along. Click Here to see it.
Timing is getting tight. The project is due to be completed by the beginning of January, when we come back to school after holiday break. That’s only a month left! Hopefully, if the Pony comes back next week, I can spend the better part of the break working on the final interior pieces.
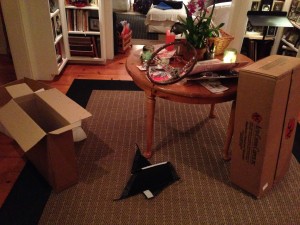
The good news is, I took advantage of Black Friday sales. I managed to order nearly all of the parts I’ll need for the interior refurbishment – things like the carpet, steering wheel, seat belts, quarter panels, door/window handles, door panel clips, upholstery hog rings, and a rear shelf with speaker holes. The pile of boxes in my room is growing daily. I held off on buying any seat-related parts, because I need to inspect them more closely to see what actually needs to be replaced. I’m excited for the Pony to come home, and to start the last phase of this journey.
Mustang Paint Job
A Few Updates, Issues, Developments
Some major progress has been made in the past couple of weeks with the project. I’ll touch on everything individually below, but the major points are as follows:
- The mechanical work that was being done by Carl Zeh’s Auto Repair has been completed
- One of the two door speakers is in and semi-functional, and
- The time for a paint job is finally upon us.
The mechanical work was the first of the two jobs I’m having done by professionals, in the interest of time, safety and quality. This part took quite a bit longer than I had expected it to, due to an issue with the wrong part for the power steering being ordered twice. Some good, money-saving news came out of it though: the source of the fluid leak – one reason for replacing the power steering – turned out to be a hole in the old tube. Replacing that tube fixed the leakage, without needing a part that would have been upwards of $500.00 to replace. Almost everything other than that part was replaced, and I can feel the difference. The best comparison I can make between what it was before and what it is now is similar to a loose faucet. The steering wheel was stiff, and had a little bit of play before it decided to turn the wheels. Now, everything is smooth and a lot more responsive to input.
The brakes had been replaced before the power steering, so while we were waiting for those parts to come in, I was able to bring the car home for the weekend to try to finish the radio wiring. The Pony still takes a while to reign in and come to a halt, but it’s certainly better than it was before.
The general hooking-up-the-wiring part was pretty easy. It was just a matter of cutting this wire, stripping it, connecting it to that one, and then on to the end coming out of the radio… but there were some unexpected issues. The first one had to do with the speaker cover. The new covers that came with the speakers are round and do not fit under the door panel. What I’m going to end up doing is using the old covers, which are square and fit perfectly. They’re in pretty good shape so I don’t feel I need to replace them.
I only installed the left speaker, just to test it and make sure I hadn’t messed anything up in the installation process. Everything was hooked up, I turned the radio on, plugged in my iPhone and sound came out! It was a little muffled at first, but that was just due to some settings and knobs I had to change on the radio. The speakers seemed pretty loud, but I wanted to hear it with the engine running, as I would if I were driving along.
I turned on the engine and put on some Eric Clapton. Then I closed the car door… and the music stopped. Fantastic! The radio works and sounds pretty good, as long as the doors are open. No problem, I’ll just drive with my doors open!
Sarcasm aside, this was certainly an issue that needed to be solved. After a bit of troubleshooting, tweaking and hair-pulling, I traced the issue back to the power wiring of the radio. I had hooked the radio up to what I thought was a source of constant power, but it turned out to be connected to the dome light circuitry, which turns off when the doors are closed. What I know now is that there is no easy source of constant power that I can just connect to. I will either have to run a wire directly from the battery, or tap into the cigarette lighter, which has a short circuit problem.
In other news, the car is about to go in to get a paint job from a local body-work guy named Ricardo, who comes highly recommended by a friend of ours. We did some comparison shopping, and Ricardo’s price is definitely the best, and the work we’ve seen of his is excellent. This is certainly going to be the most visually appealing part of the project. Nothing I’ve done so far has been cosmetic, and so none of it is really apparent yet. Body work will be obvious and impressive, and this is the part that I’m most excited about. The car’s going to be looking it’s finest when it gets back in a few weeks’ time. Ricardo has also offered to do some other body-work-related things, like replacing the dry, worn out seals, spraying some rust managing substances on the underbody and possibly replacing one piece of broken trim.
Once all that’s done, I can get to work on the interior – replacing the seats, paneling, carpeting etc. The project finally seems like it’s coming together and it’s really exciting to think about what my finished product will be in two months!

